
In today’s fast-paced world, the urgency of finding the perfect gift often collides with the constraints of time. This is where the concept of last minute gifts for him DIY comes into play, offering a solution to the dilemma of time constraints. Whether it’s a forgotten birthday, a spontaneous celebration, or simply the need for a heartfelt gesture in a pinch, last minute DIY gifts provide a lifeline for those moments when time is of the essence.
The significance of personalized and thoughtful gifts cannot be overstated. They serve as tangible expressions of love, care, and appreciation, transcending the material value of the gift itself. In a world saturated with mass-produced items, personalized gifts stand out for their ability to forge a deeper connection between the giver and the recipient. They showcase the effort, creativity, and thoughtfulness invested in the gift-giving process, leaving a lasting impression that goes beyond the moment of exchange.
This article aims to provide a comprehensive guide to creating last minute gifts for him DIY, offering a diverse array of ideas to suit various occasions and preferences. From practical and utilitarian gifts to sentimental and heartfelt gestures, the content of this article is designed to inspire and empower readers to unleash their creativity and resourcefulness. Each section will explore a different DIY gift idea, complete with step-by-step instructions, tips, and suggestions for customization. Whether you’re a seasoned crafter or a novice DIY enthusiast, there’s something for everyone in this guide to last minute gifts for him DIY. So let’s dive in and discover the joy of creating meaningful and memorable gifts, even in the eleventh hour.
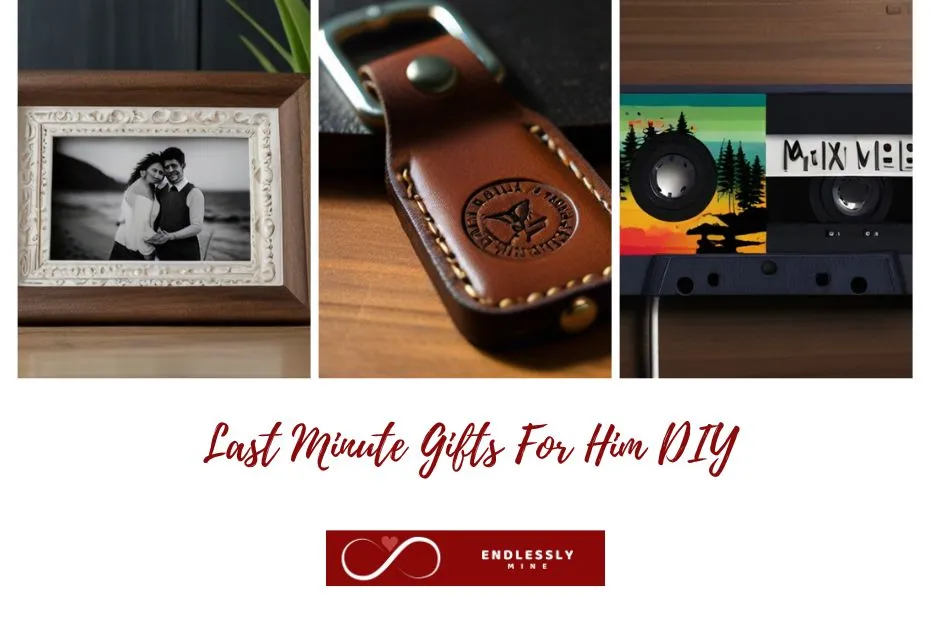
Last Minute Gifts For Him DIY Ideas
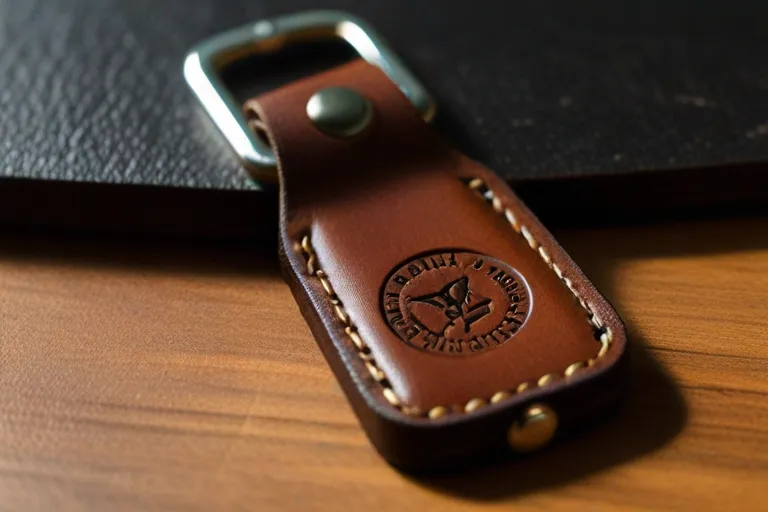
Customized Leather Keychain
- Materials Needed:
- Leather scraps or pre-cut pieces
- Keychain hardware (ring and clip)
- Leather glue or strong adhesive
- Leather stamping tools (optional)
- Leather dye or paint (optional)
- Leather conditioner (optional)
- Step-by-Step Instructions: i. Cut the leather piece into the desired shape and size for the keychain. You can choose from classic shapes like rectangles or circles, or get creative with custom shapes. ii. Use leather stamps to add initials, a name, or a meaningful symbol to the surface of the leather. This step adds a personalized touch to the keychain. iii. If desired, dye or paint the leather to add color and dimension to the design. Allow the dye or paint to dry completely before moving on to the next step. iv. Apply a small amount of leather glue or adhesive to one end of the leather piece and fold it over to create a loop. This will serve as the attachment point for the keychain hardware. v. Once the glue has dried, attach the keychain ring and clip to the looped end of the leather using pliers or a jump ring tool. Ensure that the hardware is securely fastened to prevent any accidental loss of keys. vi. Optional: Apply a coat of leather conditioner to the finished keychain to protect the leather and enhance its durability and appearance.
- Importance of Personalization: Personalization adds a meaningful and sentimental touch to the gift, transforming it from a simple accessory into a cherished keepsake. By adding initials, a name, or a special symbol to the leather keychain, you’re creating a unique and one-of-a-kind item that reflects the recipient’s personality and style. Every time they reach for their keys, they’ll be reminded of the thought and effort you put into creating a gift that’s truly tailored to them. Plus, personalized gifts have a timeless appeal that never goes out of style, making them the perfect choice for any occasion.
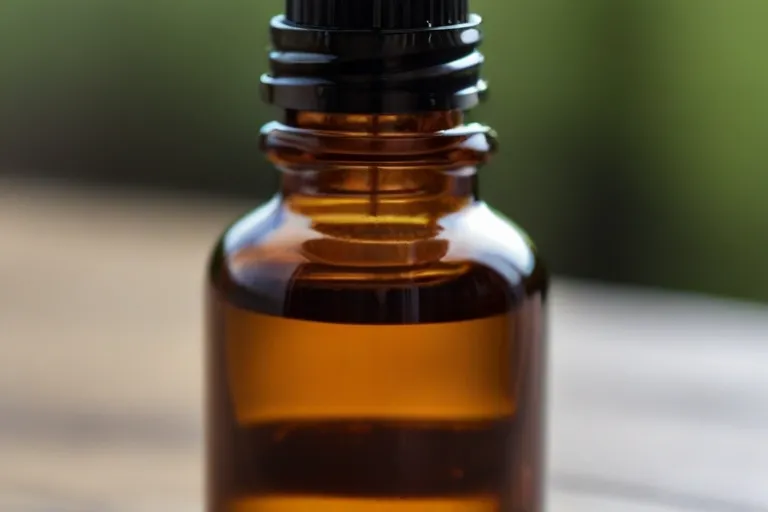
Homemade Beard Oil
- Benefits of Homemade Grooming Products:
- Control over ingredients: Homemade grooming products allow you to select natural, high-quality ingredients tailored to your specific needs, avoiding harsh chemicals often found in commercial products.
- Customization: You have the flexibility to customize the scent, consistency, and potency of the product according to personal preferences and skin type.
- Cost-effective: Making your own grooming products can be more economical in the long run compared to purchasing expensive commercial brands, especially when using common household ingredients.
- Sustainability: By making your own grooming products, you can reduce packaging waste and minimize your environmental footprint, contributing to a more sustainable lifestyle.
- Ingredients Required:
- Carrier oils: Choose lightweight and nourishing oils such as jojoba oil, argan oil, sweet almond oil, or grapeseed oil as the base of the beard oil.
- Essential oils: Select essential oils with aromatic and therapeutic properties to add fragrance and enhance the benefits of the beard oil. Popular options include cedarwood, sandalwood, peppermint, tea tree, and lavender essential oils.
- Optional additives: You may include additional ingredients such as vitamin E oil (a natural antioxidant), castor oil (promotes hair growth), or fractionated coconut oil (lightweight and non-greasy).
- Simple Recipe and Instructions:
- Ingredients:
- 2 tablespoons of carrier oil (e.g., jojoba oil)5-10 drops of essential oil (e.g., cedarwood or sandalwood)Optional: 1 teaspoon of vitamin E oil
- Ingredients:
Handcrafted Photo Frame
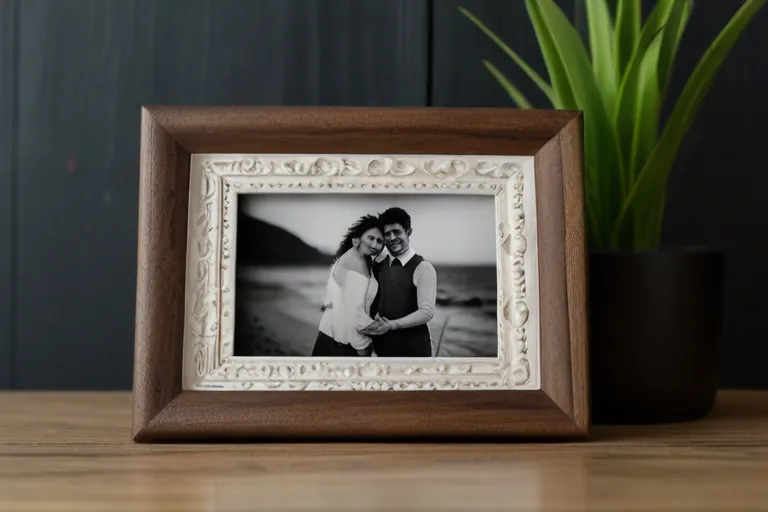
- Significance of Memories in Gifts:
- Memories hold a profound significance in gift-giving, serving as bridges that connect the giver and the recipient on an emotional level.
- Gifts that encapsulate cherished memories evoke nostalgia, gratitude, and a sense of shared experiences, strengthening bonds and fostering deeper connections.
- In today’s fast-paced world, where time often feels like a luxury, last minute gifts for him DIY that incorporate memories offer a meaningful and heartfelt alternative to store-bought presents.
- Whether it’s a snapshot from a memorable trip, a candid moment captured during a special occasion, or a cherished photograph from times gone by, a handcrafted photo frame allows you to preserve and showcase these precious memories in a tangible and enduring form.
- Materials and Tools Necessary:
- Wooden frame or frame kit
- Sandpaper or sanding block
- Paint or stain (optional)
- Paintbrush or foam brush
- Decorative elements (e.g., stickers, beads, shells)
- Glue or adhesive
- Photograph(s)
- Clear acrylic or glass sheet (if not included with the frame)
- Creative Ways to Personalize the Frame:
- Incorporate meaningful quotes or messages: Write a heartfelt message or quote directly onto the frame using paint pens or markers, or print it onto decorative paper and affix it to the frame.
- Customize with initials or names: Add the recipient’s initials, name, or monogram to the frame using wooden or metal letters, stencils, or vinyl decals.
- Theme-based embellishments: Tailor the frame to reflect the recipient’s interests, hobbies, or personality by embellishing it with themed decorations such as sports memorabilia, travel souvenirs, or music notes.
- Create a collage: Arrange multiple photographs within the frame to create a collage that tells a story or captures a series of memorable moments.
- Personalized engraving: If working with a wooden frame, consider engraving a special message, date, or symbol onto the wood using a wood burning tool or laser engraver for a permanent and personalized touch.
- Interactive elements: Incorporate interactive elements such as mini photo clips or clothespins, allowing the recipient to easily switch out and display different photographs over time.
By infusing the photo frame with personal touches and memories, you transform it from a simple home decor item into a cherished memento that speaks volumes about your relationship and shared experiences. These creative and personalized touches elevate last minute gifts for him DIY to a whole new level, ensuring that your gift will be treasured for years to come.
DIY Personalized Mug
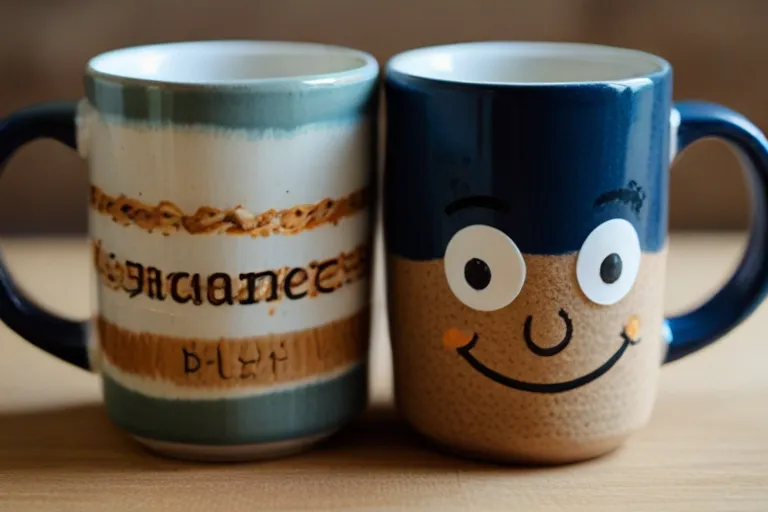
- Appeal of Personalized Items:
- Personalized items hold a special appeal as they are uniquely tailored to the recipient, reflecting their individuality, interests, and preferences.
- Unlike mass-produced gifts, personalized items convey a sense of thoughtfulness and effort, making them more meaningful and memorable.
- In the realm of last-minute gifts for him DIY, personalized mugs offer a versatile canvas for creativity, allowing you to add a personal touch to an everyday item that will be used and appreciated on a daily basis.
- Whether adorned with a heartfelt message, a favorite quote, or a custom design, a personalized mug serves as a constant reminder of the bond shared between the giver and the recipient, making it a cherished keepsake for years to come.
- Supplies Needed for This Project:
- Plain ceramic or porcelain mug(s)
- Permanent markers or paint pens (oil-based or ceramic markers work best)
- Stencils or stickers (optional)
- Rubbing alcohol or acetone for cleaning (if using markers)
- Oven (if using ceramic markers that require baking to set)
- Clear sealant spray (optional, for added durability)
- Techniques for Customizing the Mug:
- Freehand drawing: Use permanent markers or paint pens to draw directly onto the surface of the mug, creating your own designs, doodles, or messages. This allows for maximum creativity and personalization.
- Stenciling: Place a stencil or adhesive sticker onto the mug and use markers or paint pens to fill in the design. Once dry, carefully remove the stencil to reveal the personalized design underneath.
- Handwriting or calligraphy: Write a personalized message, name, or quote onto the mug using your own handwriting or calligraphy skills. Practice on paper beforehand if needed, and use a fine-tip marker for precision.
- Decals or transfers: Create custom decals or use pre-made ones to decorate the mug. Apply the decal to the mug following the manufacturer’s instructions, then seal it with a clear sealant spray for added durability.
- Masking tape or painter’s tape: Use tape to create clean, straight lines or geometric shapes on the mug. Apply markers or paint
pens within the taped-off areas, then carefully remove the tape to reveal the personalized design.
By employing these techniques, you can transform a plain mug into a unique and meaningful gift that reflects the recipient’s personality and interests. Whether you opt for intricate designs, heartfelt messages, or playful doodles, the result is a personalized masterpiece that is sure to bring joy and warmth with every sip. Perfect for those last minute gifts for him DIY, a personalized mug is a thoughtful gesture that will be appreciated and cherished for its sentiment and creativity.
Personalized Playlist or Mixtape
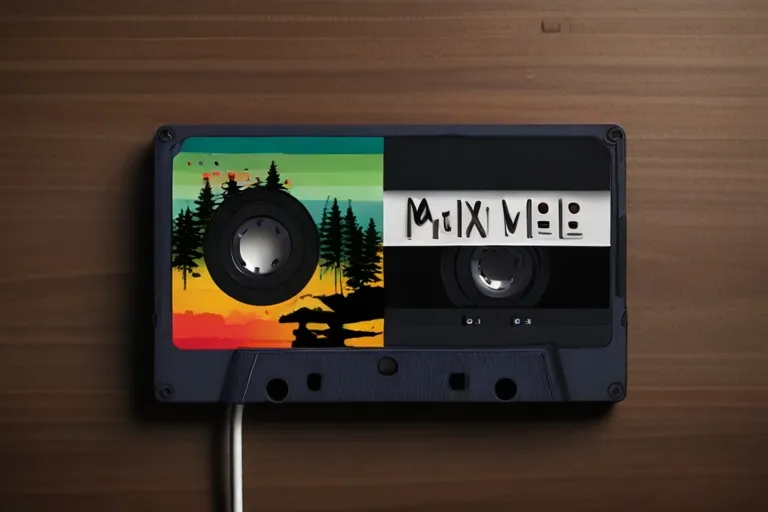
- Emotional Significance of Music:
- Music has a profound ability to evoke emotions, trigger memories, and create connections.
- A personalized playlist or mixtape allows you to curate a selection of songs that hold special meaning or significance to the recipient, making it a heartfelt and thoughtful gift.
- Whether it’s songs that remind them of shared experiences, evoke nostalgia, or simply resonate with their tastes and preferences, the emotional impact of a carefully curated playlist can be profound.
- In the realm of last minute gifts for him DIY, a personalized playlist offers a quick and meaningful way to express your feelings and create a lasting memory through the power of music.
- Platforms and Tools for Creating Playlists:
- Streaming services: Platforms like Spotify, Apple Music, and YouTube Music offer easy-to-use tools for creating and sharing playlists. Simply sign up for an account, search for your favorite songs, and add them to a playlist.
- Music editing software: For those who prefer a more hands-on approach, music editing software such as Audacity or GarageBand allows you to create custom mixes and transitions between songs.
- Online playlist generators: Websites like Playlist.com or 8tracks.com provide tools for generating playlists based on mood, genre, or theme, making it easy to discover new music and create personalized playlists.
- Tips for Curating a Thoughtful Selection of Songs:
- Consider the recipient’s preferences: Take into account their favorite genres, artists, and songs when selecting tracks for the playlist. Tailor the selection to their musical tastes to ensure maximum enjoyment.
- Include meaningful songs: Choose songs that hold special significance to the recipient, such as tracks from their favorite band, songs from memorable moments shared together, or tracks with lyrics that resonate with them personally.
- Create a cohesive theme or mood: Think about the mood or theme you want to convey with the playlist, whether it’s upbeat and energetic, calming and relaxing, or nostalgic and reflective. Select songs that complement each other and flow seamlessly from one track to the next.
- Mix it up: Don’t be afraid to mix genres, tempos, and styles to keep the playlist interesting and engaging. Variety adds depth and texture to the listening experience, ensuring that there’s something for every mood and occasion.
- Add a personal touch: Consider including a personalized message or dedication along with the playlist to add an extra layer of sentimentality and make the gift feel more personal.
Creating a personalized playlist or mixtape is a thoughtful and heartfelt way to show someone you care, even at the last minute. Whether it’s for a special occasion or just because, a carefully curated selection of songs has the power to brighten someone’s day and create lasting memories through the universal language of music.
Homemade Bath Bombs
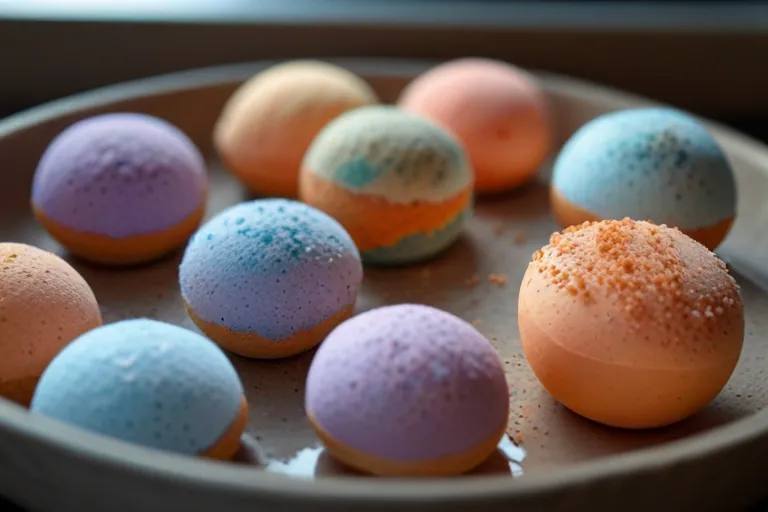
- Relaxation Benefits of Bath Products:
- Bath products, such as bath bombs, offer numerous relaxation benefits, making them ideal for unwinding after a long day.
- Bath bombs are infused with soothing ingredients like essential oils, Epsom salt, and baking soda, which help to relax muscles, reduce stress, and promote a sense of well-being.
- The fizzing action of bath bombs releases aromatic scents and creates a luxurious spa-like experience, transforming an ordinary bath into a rejuvenating retreat.
- In the context of last minute gifts for him DIY, homemade bath bombs offer a convenient and thoughtful way to pamper and indulge the recipient, providing a moment of relaxation and self-care amidst the hustle and bustle of daily life.
- Ingredients for DIY Bath Bombs:
- Baking soda: Acts as a base ingredient that helps to create the fizzing action in bath bombs.
- Citric acid: Reacts with baking soda to produce the fizzing effect when the bath bomb is added to water.
- Epsom salt: Known for its muscle-relaxing properties, Epsom salt helps to soothe tired muscles and promote relaxation.
- Essential oils: Add fragrance and therapeutic benefits to bath bombs. Popular options include lavender for relaxation, peppermint for invigoration, and eucalyptus for congestion relief.
- Carrier oils: Provide moisture and nourishment to the skin. Options include coconut oil, almond oil, or jojoba oil.
- Food coloring or natural colorants (optional): Add color to the bath bombs for visual appeal.
- Instructions for Making and Packaging Them:
- In a large mixing bowl, combine 1 cup of baking soda, 1/2 cup of citric acid, and 1/2 cup of Epsom salt. Mix well to ensure uniform distribution of ingredients.
- Add 2-3 tablespoons of melted coconut oil or another carrier oil of your choice to the dry ingredients. Mix until the mixture resembles wet sand and holds its shape when squeezed together.
- Add 20-30 drops of your preferred essential oils to the mixture, adjusting the amount according to personal preference and desired fragrance intensity. Mix thoroughly to evenly distribute the scent.
- If desired, add a few drops of food coloring or natural colorants to the mixture to achieve the desired hue. Mix until the color is evenly distributed throughout the mixture.
- Using bath bomb molds or your hands, pack the mixture firmly into molds, pressing down to compact the ingredients.
- Allow the bath bombs to dry and harden for at least 24 hours in a cool, dry place before removing them from the molds.
- Once fully dry, carefully remove the bath bombs from the molds and package them in airtight containers or decorative packaging. Consider adding tissue paper, ribbons, or labels for a personalized touch.
- Creating and packaging homemade bath bombs is a delightful and rewarding DIY project that offers both relaxation benefits and a thoughtful gift option for him, even when time is limited. With simple ingredients and easy-to-follow instructions, you can create a luxurious spa experience at home, allowing the recipient to unwind and recharge with every use.
DIY Wallet or Cardholder
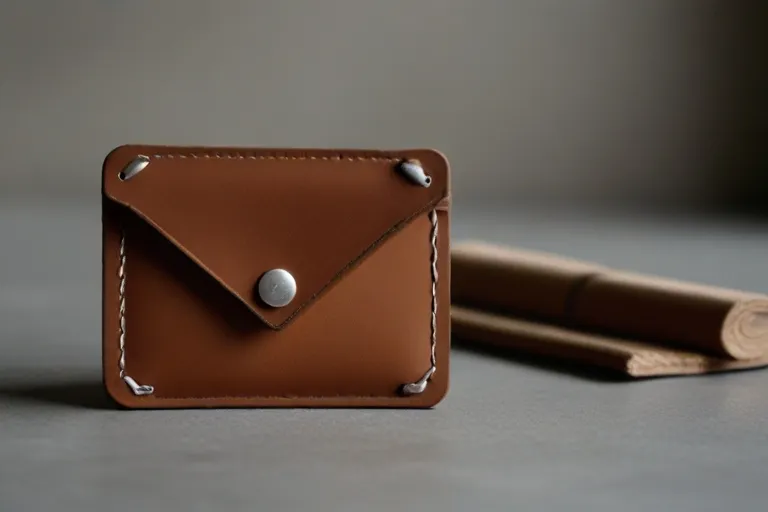
- Practical and Stylish Accessory:
- A DIY wallet or cardholder is not only a practical accessory for organizing cards and cash but also a stylish fashion statement that reflects the recipient’s personality.
- Handmade wallets and cardholders offer a unique touch that sets them apart from mass-produced alternatives, making them ideal last-minute gifts for him DIY.
- With a variety of materials, colors, and designs to choose from, you can create a wallet or cardholder that suits the recipient’s style preferences and individual needs, whether they prefer minimalist designs or bold patterns.
- Sewing or Crafting Supplies Needed:
- Fabric: Choose a durable and stylish fabric for the exterior of the wallet or cardholder, such as cotton canvas, denim, leather, or faux leather.
- Lining fabric: Select a coordinating fabric for the interior lining to add a pop of color or contrast.
- Interfacing: Use interfacing to add structure and stability to the wallet or cardholder.
- Thread: Select a thread color that complements the fabric for sewing the pieces together.
- Sewing machine or needle and thread: Depending on your preference and skill level, you can use a sewing machine for faster stitching or hand-sew the wallet for a more personalized touch.
- Scissors or rotary cutter: Use scissors or a rotary cutter to cut the fabric and interfacing to the desired size and shape.
- Ruler or measuring tape: Measure and mark the fabric accurately to ensure precise cuts and stitching.
- Closure hardware (optional): Depending on the design of the wallet or cardholder, you may need closure hardware such as snaps, buttons, or Velcro.
- Tutorial for Making a Basic Wallet or Cardholder:
- Cut two identical rectangles from the main fabric for the exterior of the wallet or cardholder, and two rectangles from the lining fabric for the interior.
- Cut one smaller rectangle from interfacing for added structure, and fuse it to one of the exterior fabric pieces following the manufacturer’s instructions.
- Place the two exterior fabric pieces right sides together, and sew along three sides, leaving one short side open for turning.
- Repeat the same process with the lining fabric pieces, leaving a small opening on one side for turning.
- Clip the corners of the sewn pieces to reduce bulk, and turn both the exterior and lining right side out.
- Press the seams flat with an iron, and topstitch along the open edge of the exterior piece for a clean finish.
- Slip the lining into the exterior piece, aligning the raw edges, and hand-sew or machine-sew the opening closed.
- Fold the wallet or cardholder in half, and topstitch along the folded edge to create card slots or compartments.
- if desired, add closure hardware such as snaps or buttons to secure the wallet or cardholder shut.
- Trim any loose threads and press the finished wallet or cardholder with an iron for a polished look.
Creating a DIY wallet or cardholder is a fun and rewarding project that allows you to customize a practical accessory for the recipient, making it a thoughtful last minute gift for him DIY. With basic sewing or crafting skills and a few supplies, you can create a stylish and functional accessory that will be appreciated and used for years to come.
Tips for Successful Last-Minute DIY Gifting
A. Plan ahead when possible:
- While last minute DIY gifting can be a lifesaver, whenever possible, try to plan ahead and anticipate upcoming occasions or events that may require gifts.
- Keep a list of gift ideas or potential DIY projects for various recipients, so you have options readily available when time is limited.
- Set aside dedicated time for crafting or assembling gifts, even if it’s just a few minutes each day leading up to the occasion.
B. Use readily available materials:
- When time is of the essence, opt for DIY projects that require minimal supplies and can be made using readily available materials.
- Raid your craft stash, scour your kitchen cabinets, or visit your local craft store for basic supplies that can be repurposed for last-minute gifts.
- Get creative with substitutions and improvisations, using what you have on hand to bring your DIY vision to life.
C. Personalize the gift to his interests and preferences:
- The key to a successful last minute DIY gift is personalization. Tailor the gift to the recipient’s interests, hobbies, and preferences to ensure it resonates with them on a deeper level.
- Consider their favorite colors, patterns, or themes when selecting materials and designs for the gift.
- Incorporate elements that reflect their personality, such as inside jokes, meaningful quotes, or references to shared experiences.
D. Embrace imperfections and focus on the sentiment behind the gift:
- In the rush to create a last minute DIY gift, it’s easy to get caught up in achieving perfection. However, it’s important to remember that it’s the sentiment behind the gift that truly matters.
- Embrace imperfections as part of the charm and uniqueness of handmade gifts. They add character and authenticity to the final product.
- Focus on the thought and effort you’ve put into creating the gift, rather than striving for flawless execution. Your recipient will appreciate the time and care you’ve invested in crafting something especially for them.
By following these tips, you can navigate the challenges of last-minute gift-giving with ease, ensuring that your DIY creations are not only thoughtful and meaningful but also practical and enjoyable for the recipient. Whether it’s a birthday, anniversary, or just because, last minute gifts for him DIY are a heartfelt way to show your love and appreciation, even when time is tight.
Also Read: 20 Wedding Gift For Best Friend Male
Conclusion
In the realm of last minute gifts for him DIY, creativity and sentimentality reign supreme. While time may be limited, the thought and effort put into crafting a personalized gift hold immeasurable value. From customized playlists to handcrafted treasures, each creation is a testament to the giver’s care and attention. By embracing imperfections and focusing on the heartfelt sentiment behind the gift, recipients are sure to cherish these tokens of affection. With a touch of creativity and a dash of resourcefulness, last minute DIY gift become cherished keepsakes that strengthen bonds and create lasting memories.